If you’ve ever tried to photograph a woodland, you’ll know that it’s not easy to do it justice in a still image. Woods and forests are visually busy environments. And that often makes carving meaningful compositions out of them a challenge. Moreover, if you try to shoot in direct sunlight, harsh patchy contrast makes things even more difficult. So I’d like to share with you a few tips on photographing woodlands. This is by no means an exhaustive repertoire of possible devices and approaches you can take. But these things have worked for me over the years. And I trust they will help you learn how to photograph woodlands and forests, too.
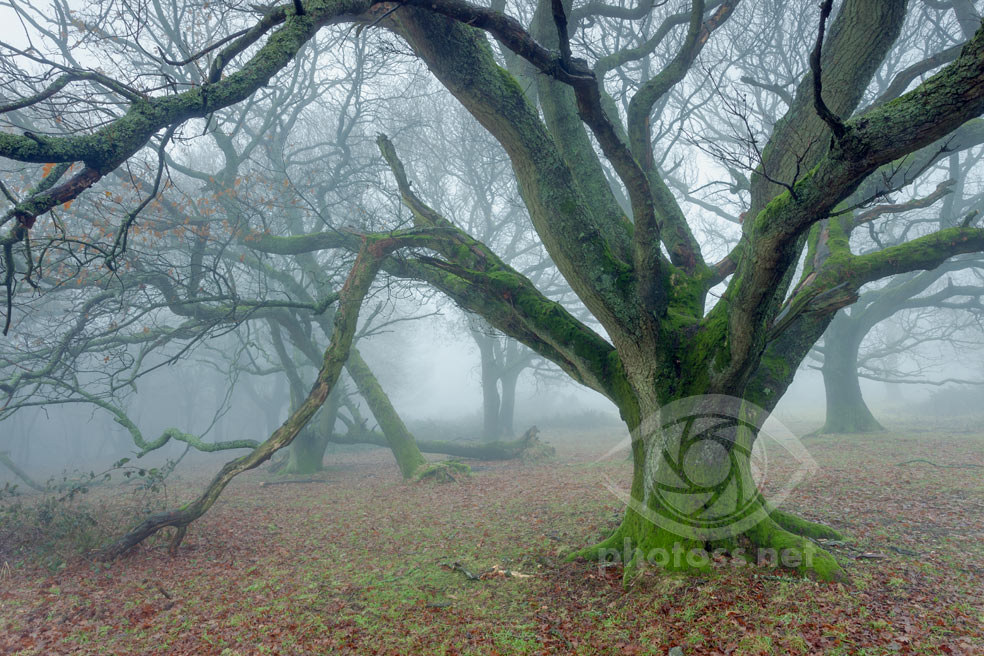
A super wide angle shot of a foggy woodland in South Downs National Park near Brighton.
Size Matters
In general, older, larger and more sparsely growing trees make for better subject matter. Since they have more interesting shapes, scars of time, more personality… So look for woods, or patches within them, with mature trees. At the same time, less undergrowth will further help you create cleaner compositions. Unless you choose to shoot above the forest floor. In which case mess at the bottom is not an issue.
Conversely, younger and more tightly growing trees typically look more samey. They also create a denser and more uniform rhythm. And that makes it much more difficult to find a strong focal point that stands apart from the busyness around it. Besides, their branches grow lower and are finer, often making for an indistinct tangle.
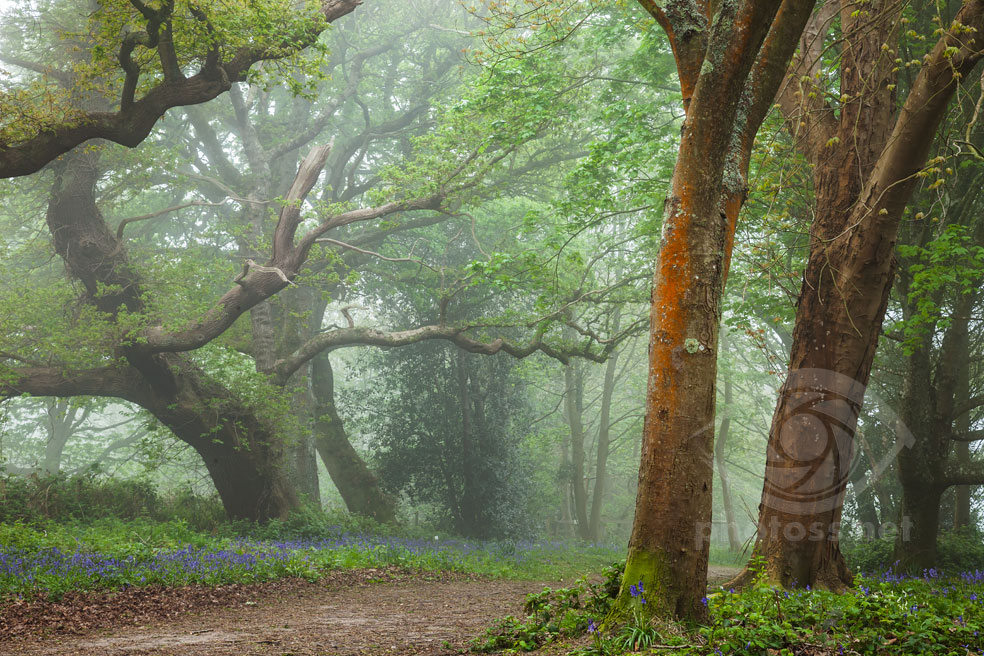
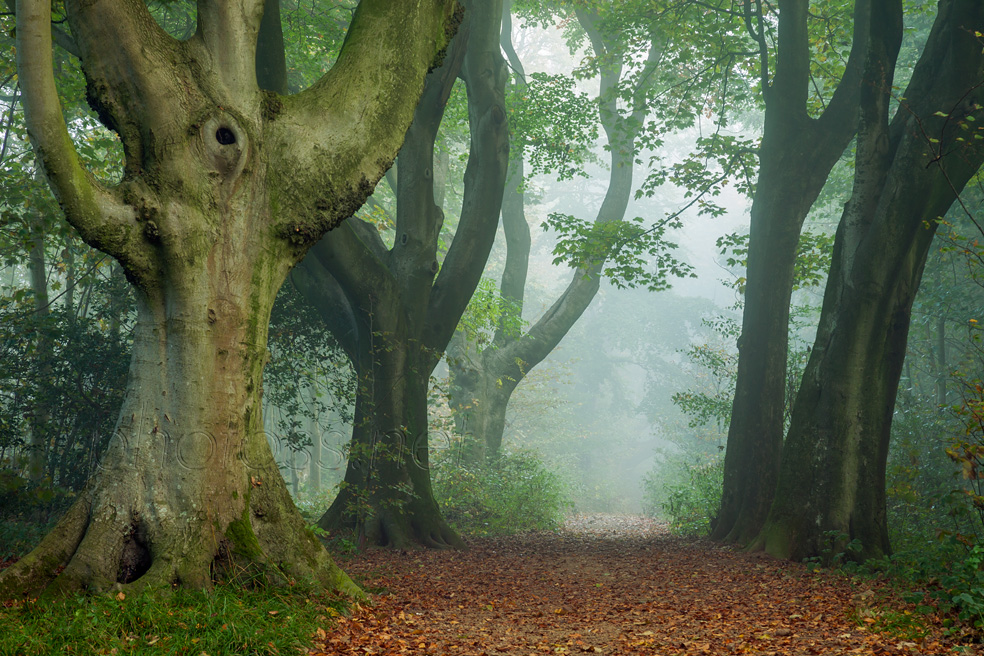
Foggy morning in a West Sussex woodland. The rusty lichen on the foreground trees drew my attention, atmosphere helped create more depth.
Break Patterns
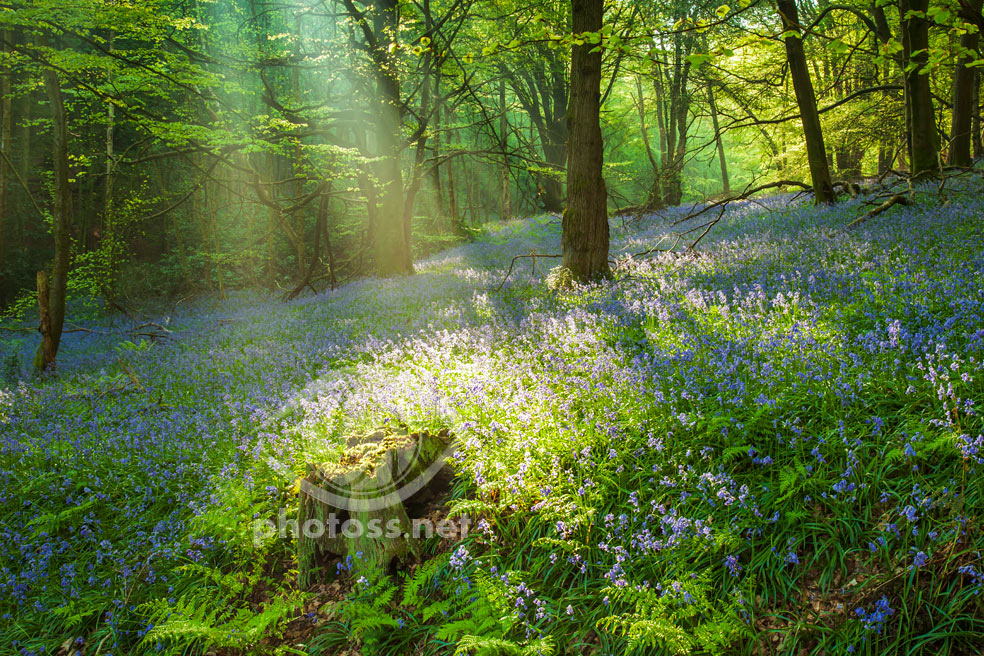
Due to their nature, woodlands frequently create strong rhythms of vertical shapes. To achieve a more interesting composition, try looking for something that breaks that pattern. Whether it be a single different looking tree, or a clump of them, like a silver birch amidst beeches. Or a stump, a fallen tree, a tuft of bluebells. Or maybe a bunch of vividly coloured leaves against a greyish sea of trunks behind it. Even a winding footpath between the trees can sometimes provide enough of a counterpoint.
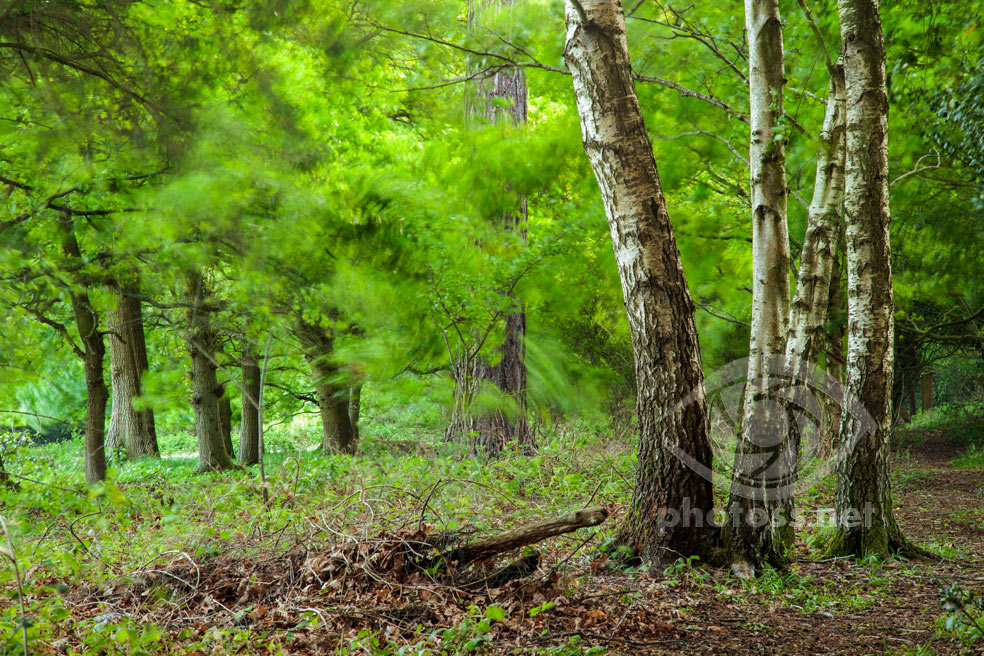
A woodland in Mid Sussex. I used a longer exposure (13 seconds) to blur the background branches swaying on the wind, and so to get better separation. It also created a somewhat painterly effect.
Weather & Time of Day
Theoretically you can take a decent forest scene in any weather and at any time of day. But my favourite conditions are foggy or misty daylight. Possibly with some filtered sunlight to boot. And these normally happen in early to mid morning.
In the middle of a sunny and clear day, the patches of sunlight scattered on the trunks and on the forest floor create very harsh contrasts. And that results in visually noisy and rather unappealing images. In such circumstances you might get better results shooting against the light. This way you could be able to make use of the long concentric shadows on the ground and create a (semi) silhouetted image.
Micheldever Wood. Beech trees on the edge of the woodland receiving filtered light near sunset, which gave their trunks an impression of form. Taken with a telephoto lens (250mm).
On the other hand, if the sky is overcast, the contrasts are a lot easier to expose (unless you include the sky in the frame). But if there is no fog or mist, the elements in your picture often blend together into an indistinguishable mass. So that in effect it’s often hard to tell which tree or branch is closer to the camera and which is farther away, when looking at the photo. And consequently it’s challenging to create a compelling composition. You might want to play with shallow depth of field in such conditions.
Make Space
2D SPACE
Even if you’re lucky to find a woodland with old trees, you still need to arrange them meaningfully in the composition. And I don’t only mean the arrangement within the two-dimensional space of the frame. Obviously, whenever possible you want to find a good focal point. For instance, an interestingly shaped trunk, or an impressive root system. And put it in a “strong spot” of your frame.
Autumn in Gdynia. Wide angle, atmosphere and physical distance helped me mitigate the busyness of the backdrop.
But that in and of itself may be not enough to make it stand apart from the rest of your scene. As trees in woodlands tend to blend together visually. Thus, also important is the arrangement of objects in three-dimensional space.
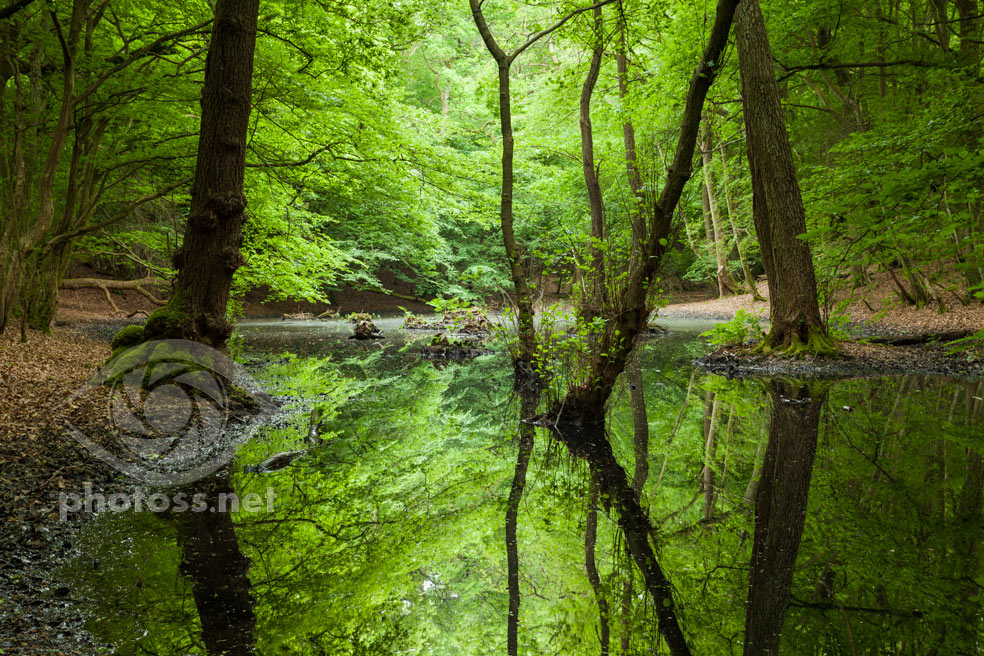
A woodland in East Sussex. Taken on an overcast day.
3D SPACE
With this in mind, what I look for when figuring out my forest compositions is not just breathing space around the main focus of the shot on the frame’s plane. But also an impression of space between it and the elements behind it. And sometimes in front of it. In order to give the image a more three-dimensional appearance.
You can create an illusion of greater distance through the use of a wide angle lens if you get close to your subject. This way you exaggerate the perspective by seemingly pushing away the background and making it appear smaller.
Chanctonbury Ring. Shooting into the sun with a super wide angle lens.
Sometimes you can simply find a perspective which offers a considerable physical distance between your focal point and the background.
Or, best of all, you can use atmosphere to create better separation. And to increase the apparent space between objects at different distances from the camera (atmospheric perspective). On rare occasions you might even be able to apply all of these “tricks” at once.
Equipment
Personally, I prefer to avoid the sky peeping through between the trees in my forest scenes. And that is because it will usually create spots of excessive contrast. Which draw the viewer’s attention away from the focus of the picture. As a result, I tend to use longer focal lengths, generally in the 50-100mm range.
But sometimes a wide angle works very well, especially if there is fog or mist. Or if you’re shooting against the light, aiming for a silhouetted effect.
Occasionally a telephoto lens can be also useful, if you can step back far enough away.
Besides, tripod is a must. Obviously the light in the woods is much lower than out in the open. And you don’t want to risk camera shake. Or increase the ISO to some ungodly heights trying to avoid it. Moreover, using a tripod is always a good idea, as it allows you to be more particular about your compositions.
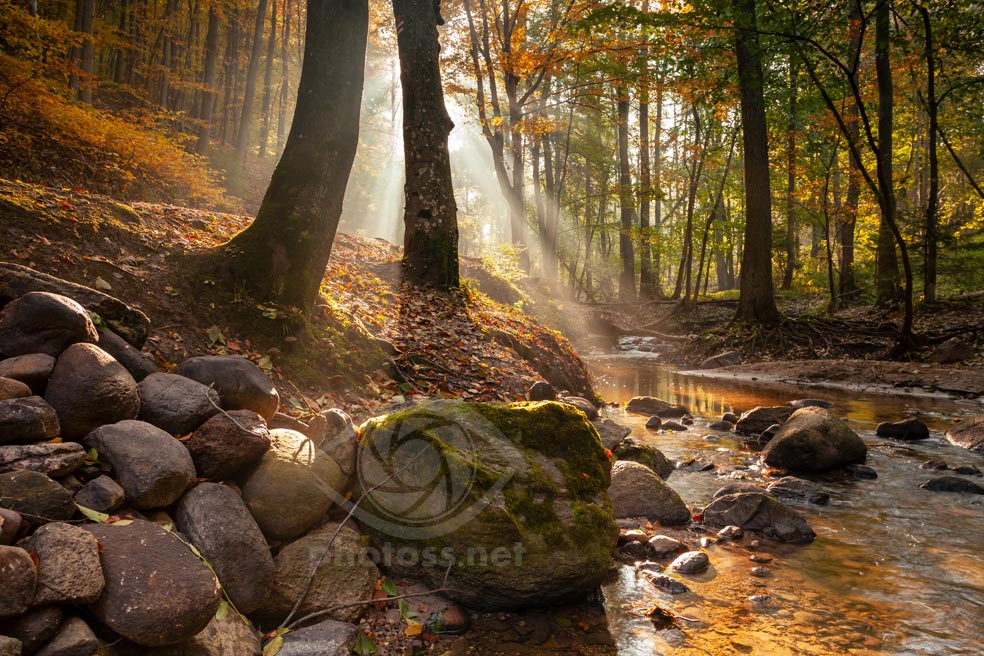
A woodland in West Sussex. Shooting into the light allowed me to capture the "shafts".
POLARISING FILTER
A polarising filter can also be helpful for your woodland exposures. And in a subtle way. One of its uses is to reduce glare or reflections off non-metallic objects. Leaves can be quite shiny and reflect a lot of light. You often don’t realise how much, until you look at them through a polariser. And when you do, it reveals what’s underneath the glare. Which is more colour. For that reason, scenes exposed with polarising filters tend to have more have more saturation.
I often get comments from my workshop guests, that they don’t really use polarisers, because they can’t see any difference. Next time you’re in a woodland, look at the foliage through the filter and slowly twist it. Indeed, try it first on your houseplants.
Because the leaves’ surfaces are turned at all kinds of angles to the light, it’s impossible to decrease the sheen on all of them at the same time. So by rotating the filter on your lens and observing the changes, you’ll find a sweet spot that works best for your scene.
Thank you for reading, I hope you found these short tips on woodland photography useful.
4 thoughts on “How to photograph woodlands & forests”
Doug Bolt
Short, sweet and to the point. I’m just going out to do some woodland photography. I’m a bit out of practice so this article was a great help and thought reviver. Thank you. Doug.
Slawek
Thank you, I’m glad you found some value in my little offering. Good luck with your woodland photography.
David
Great tips that I will go out and try. I tend to be too wide angle and have too much clutter in the image and it all tends to merge into a nothing as you suggested.
Slawek
Thank you for taking the time to read and your kind comment, best of light.
Comments are closed.
Sign up to my newsletter for info about new articles, planned workshops, camera club presentations, tips and tricks, and more:


Short, sweet and to the point. I’m just going out to do some woodland photography. I’m a bit out of practice so this article was a great help and thought reviver. Thank you. Doug.
Thank you, I’m glad you found some value in my little offering. Good luck with your woodland photography.
Great tips that I will go out and try. I tend to be too wide angle and have too much clutter in the image and it all tends to merge into a nothing as you suggested.
Thank you for taking the time to read and your kind comment, best of light.